We are big fans of hands-on learning at Mobile Ed, and history class is no exception to this technique. Though history isn’t always the most tangible topic, we are encouraging educators to get hands-on with history this Presidents’ Day with this low-prep activity students will adore.
Hands-on learning, also known as kinesthetic learning, is an effective education style that is often more compelling for students than visual or auditory learning. Hands-on projects require full participation and attention, challenging students to focus, follow instructions, and have fun! Hands-on learning:
-
-
- Builds confidence in students as they create projects and accomplish goals
- Improves retention as students experience lessons with both the left and right brain as well as sensory and motor cortexes
- Encourages problem-solving and trial-and-error as students attempt to meet a goal
- Increases attentiveness as students are required to move around and participate in the lesson
-
Celebrations of Presidents’ Day began in the 1880s when George Washington’s birthday was deemed a federal holiday. In 1977, the idea to rename the holiday to “Presidents’ Day” was introduced to include Abraham Lincoln’s birthday, which also occurs in February. We have used the new title for over 40 years as a day to reflect on important presidents from the past.
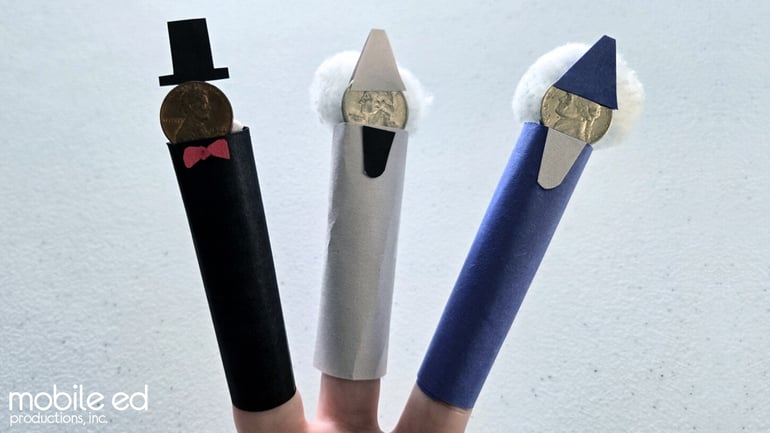
This President’s Day, our hands-on activity includes making President’s Day Puppets. Use these puppets as you teach about the US presidents, the US Mint, or a specific time in U.S. history!
Presidents’ Day Finger Puppet Project
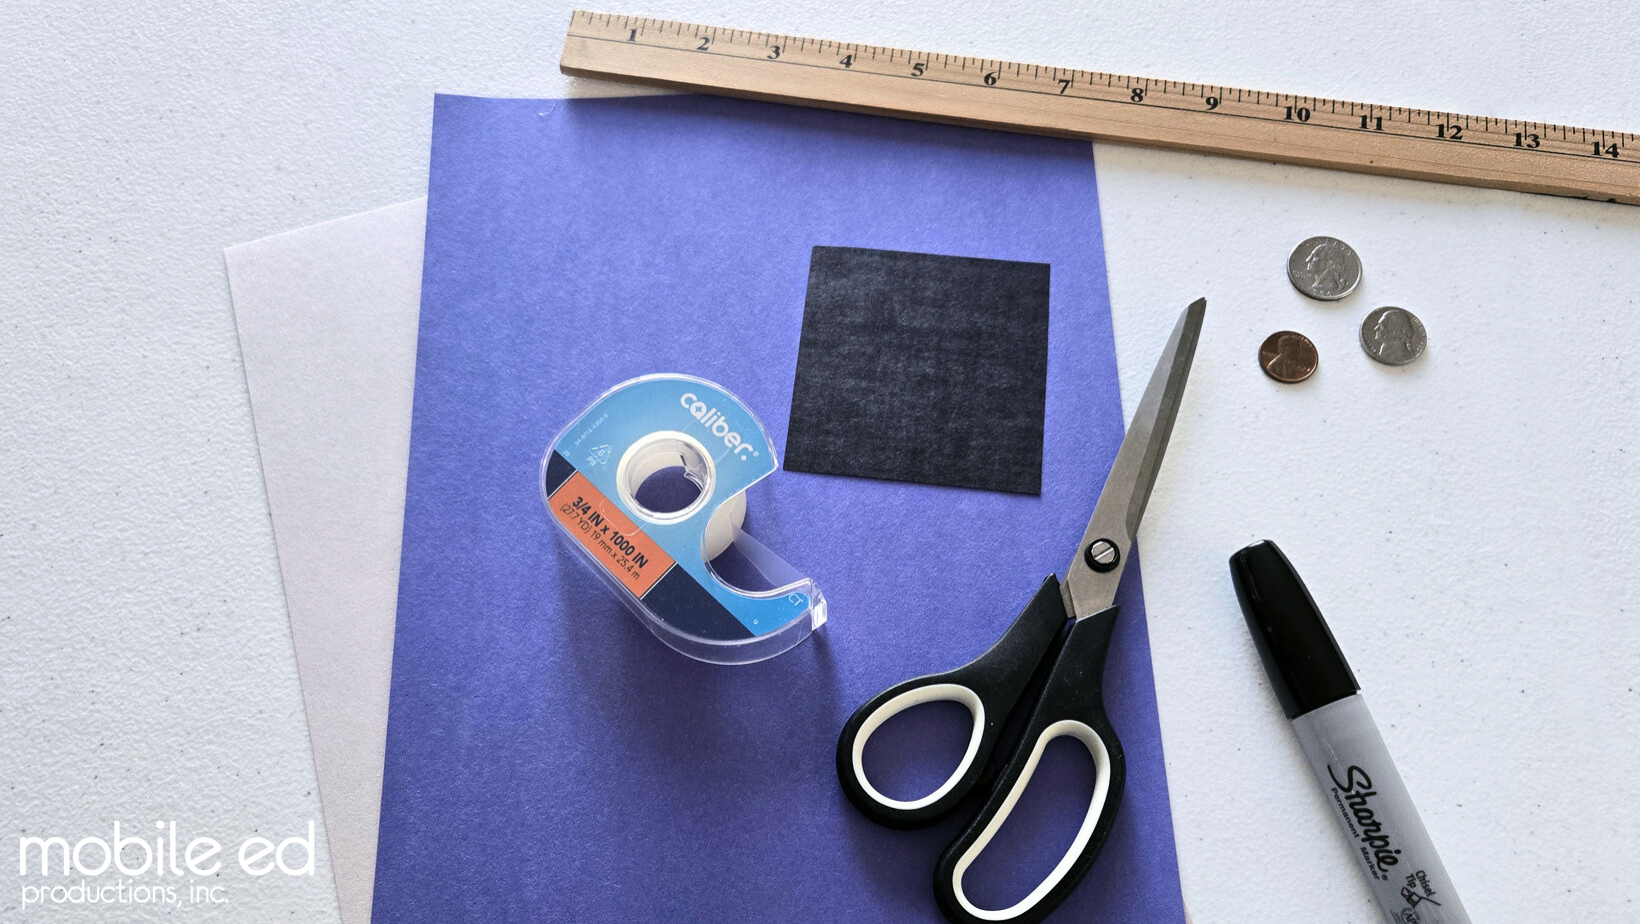
What You’ll Need
- Construction paper (blue, black, and gray)
- Pennies
- Quarters
- Nickels
- Tape
- Scissors
What You’ll Do
- Cut a three-inch square from each color of construction paper. You will have three squares. One square makes one puppet.
- Roll the squares into tubes about the width of a finger, and secure the tube with tape.
- Lincoln puppet:
- Tape a penny onto the black tube about an inch from the top.
- Cut out a thin rectangle from the black construction paper and attach it right above the penny, creating the look of a top hat.
- Washington Puppet:
- Attach the quarter to the top of the gray tube.
- Cut a 1.5-inch square from the gray construction paper. Cut the square from corner to corner to create two triangles. Place the triangles over the top of the coin to form Washington’s hat. Connect the triangles to the coin with tape.
- Jefferson Puppet:
- Tape the nickel to the top of the blue tube.
- Create a hat in the same way as the Washington puppet by repeating step 4b.
- Let students get creative! Add hair using cotton balls or draw an outfit on the puppets. Be sure to include some white ruffles!
ADVANCED VERSION: Design a backdrop for your puppets by building or sketching the White House or the U.S. Capital Building. Have a discussion about the importance of these buildings.

Be sure to check out our webpage about educational assemblies for U.S. presidents.
Blog inspired by: Living Locurto