Visually learn about water density with this easy-to-do experiment with beautiful results. By "stacking" sugar water of varying densities in a test tube you can create a stunning display of science in action. Check it out!
Watch this video to learn how to make your own water density display:
Step 1: What You'll Need
You need just a few things to make your water density experiment:
-
4 glasses of warm water
-
Food coloring
-
6 tablespoons of sugar
-
A tablespoon
-
Something to stir with
-
A baster
-
Test tube or a narrow glass (test tube works best)

Step 2: Color the Water
The first thing to do once you have located all of the necessary equipment is to color the different glasses of warm water. Each color will represent a different density of water. Use red, yellow, green and blue to get the best "rainbow" effect. Stir the coloring around to make sure it's evenly distributed.

Step 3: Add the Sugar
With your glasses of water successfully color-coded, it's now time to add the sugar to them. A different amount of sugar will be added to each glass, resulting in a different density for each color Colors with less sugar will be less dense, and colors with more sugar will be more dense!
Do not add any sugar to the red glass.
Add 1 tablespoon of sugar to the yellow glass.
Add 2 tablespoons of sugar to the green glass.
Add 3 tablespoons of sugar to the blue glass.
Stir the sugar into the warm water to make sure it dissolves completely.
Step 4: Stack the Water
It sounds impossible, but the next thing we're doing to do is actually "stack" the different colored waters on top of each other in our test tube. Get your hands steady - this might take a couple of tries to get just right, but you have plenty of water to experiment with.
To start, carefully draw the blue water into the baster. Get it nice and full, then squeeze it into your test tube. The most dense colored water will be the bottom layer.

Next, fill the baster with the green water and similarly squeeze that into the test tube as well. To avoid the layers combining, try to run the water down the side of the test tube in a gentle trickle. A little color blending is normal, especially with the bottom two layers.

Repeat this process for the yellow and red layers, being extra careful to gently release the liquid from the baster for the sharpest color separation. With all four colors in your test tube, you should have a beautiful rainbow pattern! Hold it up to a window to really see where the colors separate and blend.

That looks great! Look at the different layers. Can you see the colors mixing together a bit where the colors meet? Does that remind you of something you may have seen in another experiment?
If you had success with this experiment, step it up to the next level by adding additional colors! Insert colors like orange and purple into the spectrum to make your rainbow even more vibrant. Make sure they have the appropriate amount of sugar dissolved into them. Remember, more dense liquids are heavier and will sit lower in the test tube.
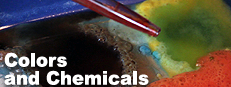
If your food coloring kit doesn't come with orange and purple, think back to what you learned in Colors and Chemicals and mix your own!

Check back again for even more do-it-yourself science experiments from Mobile Ed's Building Up STEAM series.
If you like DIY experiments like these, you should see the kinds of spectacular demonstrations we bring to schools with our live school assembly presentations. Take a look at STEAM Museum, The Magic of Science, Physics is Fun, Forces and Motion and Crime Scene Science, each full of interactive demonstrations that kids love.

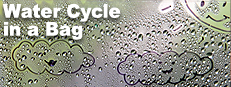
If you enjoyed making your Water Cycle in a Bag, try our other Building Up STEAM activities and experiments!
 |
|
If you have curious little ones running around the house, or are looking for a fun activity for your lower elementary kids, this is a great way to spend an afternoon they'll ask to do again and again. It's a simple "baking soda and vinegar" experiment, but with an artistic twist! |
 |
|
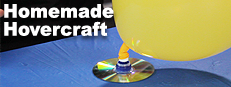
With just a few common items, in under a half-hour you could have a desktop-sized hovercraft zipping all over the place! It's great for a science project, a classroom demonstration, or a rainy day. |
 |
|
Learn how you can run a sharpened pencil all the way through a plastic bag filled with water without spilling a drop. All you need are some sharpened pencils, a plastic bag filled with water, and our secret technique! |
 |
|
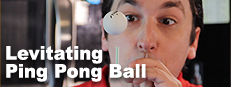
Perform the impossible when you make an ordinary ping pong ball float in mid-air! Learn how to do this super cool science feat in just a few minutes. |
 |
|
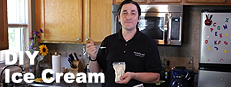
With just a few ingredients and our technique, you'll be scooping up your own frosty treats in no time. Science never tasted so good! |
|
|
|
Our most popular experiment! Do your kids ask you why it rains? Or maybe how clouds happen? Spend an afternoon teaching them with this easy to do science experiment where you and your kids will make a water cycle in a bag! |
About Mobile Ed Productions:
Mobile Ed Productions, Inc. has been in business since 1979, producing educational, entertaining school assemblies and hands-on workshops. Based out of Michigan, the company creates, designs, markets and distributes innovative ways to make learning fun in the form of live presentations and interactive exhibits.